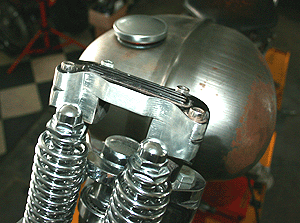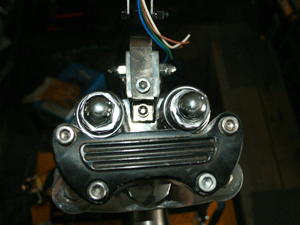


Working on the sissy bar, rear fender, risers, electrical box and mounting the seat, tail light and signal light (ya I know there is only one right now..haha).
Lots to go yet but getting there and hoping to go to paint in the next two weeks.....


Milled out the risers so I could run the adapter plate forward and keep the bars in line. They may have worked but wanted to make sure the clearance was there for the spring movement up and down. Couldn't just leave them alone I guess..ha ha.
Made the electrical box here on the rear fender for easy access and so people would ask " What's that for?" ha ha. It is mounted far enough ahead that, should Ricky want to run a stick on "P" Pad, there would be lots of room for the passanger. It also cleans up any other area that the wiring and components would have to be. Now all in one neat package!

PPAGE 1: Getting some things together CLICK HERE
PAGE 2: Up on her wheels CLICK HERE
PAGE 3: Risers, electrical box, rear fender fab CLICK HERE
PAGE 4: Tank Mounts and Rear fender mods CLICK HERE
PAGE 5: Motor and Tranny touches CLICK HERE
PAGE 6: Zeke laying some paint on CLICK HERE
PAGE 7: Engine Assembly CLICK HERE
PAGE 8: Engine Assembly complete CLICK HERE
PAGE 9: Assembly in frame begining CLICK HERE
PAGE 10: Assembly in frame CLICK HERE
PAGE 11: Assembly in frame CLICK HERE
PAGE 12: Assembly the painted stuff CLICK HERE
PAGE 13: Painted fenders CLICK HERE
PAGE 14: Outside on her wheels CLICK HERE
PAGE 15: Ricks Dad and Mom drop by to check it out CLICK HERE
PAGE 16: Working on the wiring CLICK HERE
PAGE 17: Making a new headlight mount CLICK HERE
PAGE 18: Some finished pictures and specs list CLICK HERE
PAGE 19: Its finally the day for the first Ride!!! CLICK HERE